지도 생성
Sample Code
<html>
    <head>
        <title>routo gl 시작하기</title>
        <script src="https://api.routo.com/v3/maps/map?key=[발급받은 API KEY]"></script>
        <style>
        html,
          body {
            margin: 0;
            padding: 0;
          }

          div#map {
            width: 100%;
            height: 100vh;
          }
        </style>
    </head>
    <body>
        <div id="map" class="map"></div>
        <script>
            const map = new routogl.Map({
			  container: 'map', // container ID
			  style: routogl.RoutoStyle.LIGHT,
			  center: [127.0980, 37.5107], // starting position [lng, lat]
			  zoom: 16, // starting zoom
		   });  // 지도 생성
        </script>
    </body>
</html>
1. routo API 호출
routo API Javascript, CSS 파일을 호출합니다.
map.js에는 발급받은 API KEY를 입력합니다.
<script src="https://api.routo.com/v3/maps/map?key=[발급받은 API KEY]"></script>2. routo 지도 DIV 지정
화면에 지도를 표시할 DIV를 지정합니다.
<div id="map" class="map"></div>3. routo API 호출
Script를 호출하여 지도를 생성합니다.
<script>
	const map = new routogl.Map(({
		container: 'map', // container ID
		style: routogl.RoutoStyle.LIGHT,
		center: [127.0980, 37.5107], // starting position [lng, lat]
		zoom: 16, // starting zoom
	});  // 지도 생성
</script>
4. routo Style 변경
지도 테마를 변경합니다.
<script>
	const map = new routogl.Map(({
		container: 'map', // container ID
		style: routogl.RoutoStyle.LIGHT,
		center: [127.0980, 37.5107], // starting position [lng, lat]
		zoom: 16, // starting zoom
	});  // 지도 생성
	map.setStyle(routogl.RoutoStyle.DARK);
    // map.setStyle(routogl.RoutoStyle.HYBRID);
</script>
routo Style 목록
| routo Style | 설명 | Sample |
|---|---|---|
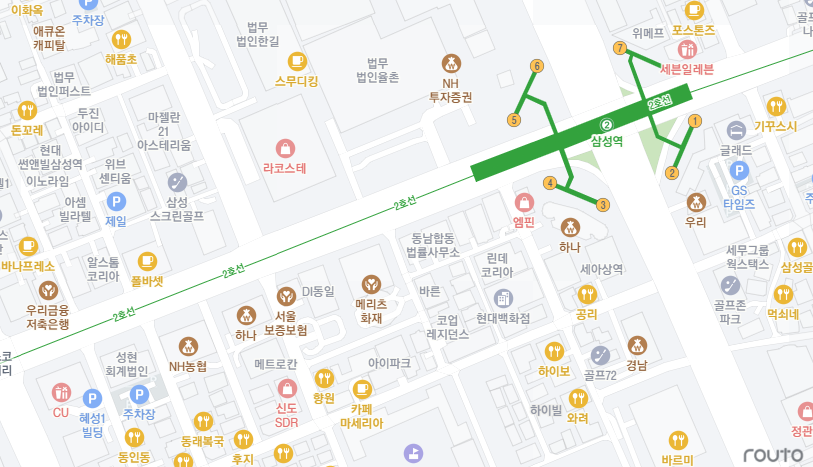
| Light | 밝은 테마의 벡터 지도입니다. | 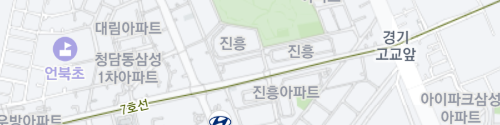 |
| Dark | 어두운 테마의 벡터 지도입니다. | 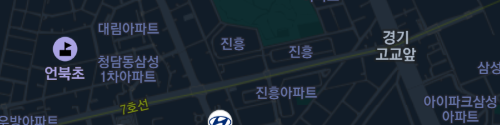 |
| Hybrid | 위성영상 배경과 혼합된 벡터 지도입니다. | 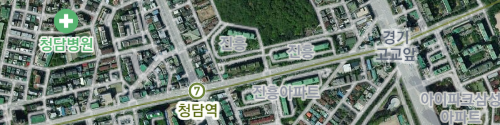 |